These instructions apply to the Nissan Pulsar Mk1 (C13) 2014-2018. For other models, please choose your vehicle here.
Last updated:
The Nissan Pulsar C13/C12/B17 (2014–2018) with the RE0F11A Continuously Variable Transmission (also called Jatco JF015E) needs fresh CVT fluid every 60,000 km — sooner if you live in a hot climate, tow regularly, or do mostly stop-and-go city driving. This is a drain-and-refill procedure (it doesn’t fully replace the fluid in the torque converter and cooler lines), but done every 60,000 km it keeps the variator pulleys and steel push-belt lubricated and prevents the harsh shifting that’s the early warning of CVT failure.
Before You Start
- Work on a flat, level surface with the parking brake engaged. The fluid-level check is temperature- and level-dependent — even a 10° list will give a wrong reading.
- Use only Nissan-approved CVT fluid NS-3 or a high-quality equivalent (Idemitsu, Aisin, ACDelco multi-vehicle CVT). Do not substitute generic ATF — CVT fluid has very different friction-modifier and viscosity specs.
- A diagnostic scanner that reads transmission temperature is ideal. As an alternative, an infrared thermometer pointed at the CVT sump will give a usable reading.
- Always replace the drain-plug crush washer with a new one — reusing the old washer is the most common cause of slow drips after a fluid change.
Tools and Supplies
- Socket set including the size for the CVT drain plug (typically 19 mm or 24 mm depending on production date — check before you raise the car).
- Torque wrench reading at least up to 40 Nm.
- Drain pan with at least 5 L capacity.
- Hand pump or funnel-with-long-hose to refill via the filler port (gravity refill is impractical due to the port location).
- Jack, axle stands, wheel chocks. Never get under the car on a jack alone.
- 4 L of fresh CVT fluid (3 L for the drain-and-refill, 1 L spare for the level check).
- Two new sealing washers (drain plug + overflow tube).
- Diagnostic scanner or IR thermometer for fluid temperature.
- Nitrile gloves and shop towels.
Draining the CVT Fluid
- Drive the car for 5–10 minutes to warm the fluid to normal operating temperature, then park on level ground.
- Raise the vehicle securely on jack and axle stands. Chock the rear wheels before any lifting.
- Place the drain pan under the transmission, positioned to catch fluid flowing from the drain plug AND the overflow tube.
- Remove the drain plug and allow the old fluid to drain completely (5–10 minutes — wait for it to slow to a drip).
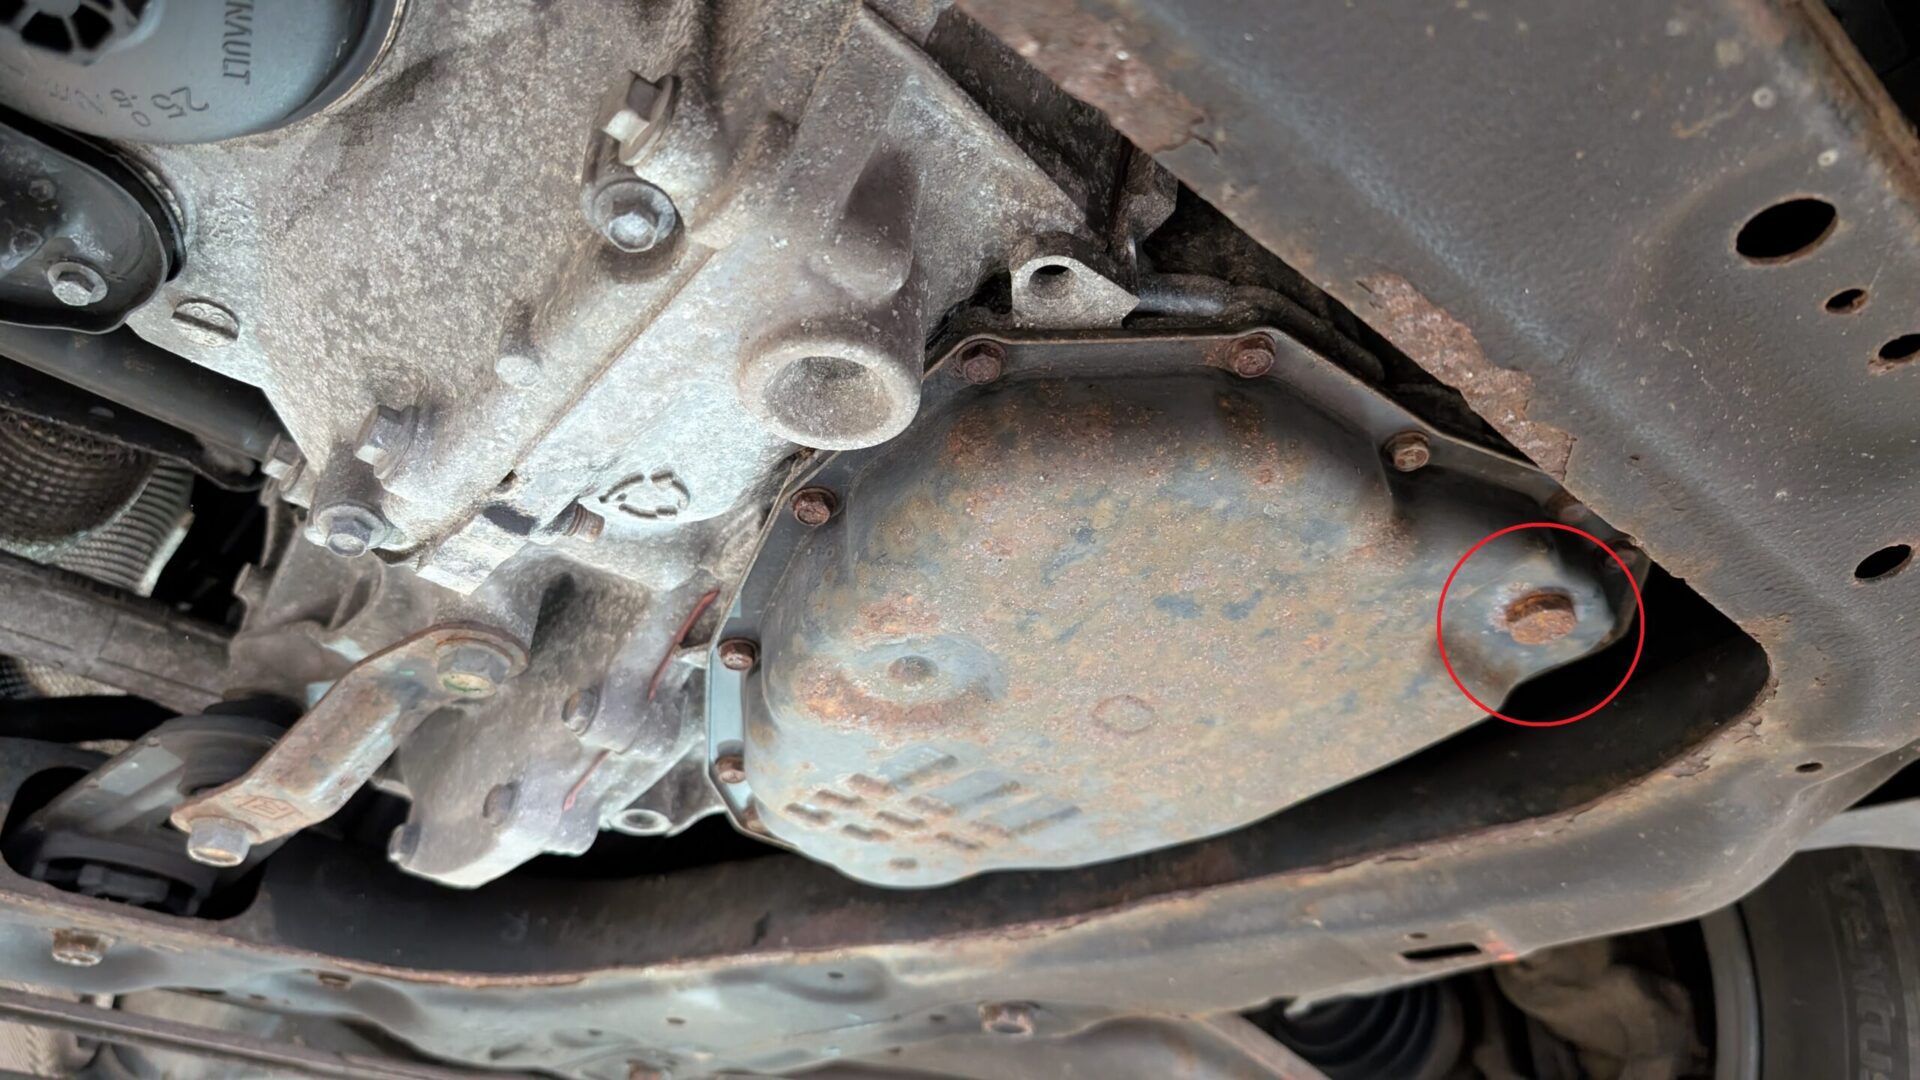
- With the drain plug out, you’ll see the overflow tube projecting inward from inside the drain opening. Remove the overflow tube (typically a 6 or 8 mm hex socket on the inner shoulder).
- Allow any residual fluid to drain through the wider opening.
- Reinstall the drain plug temporarily (snug, not torqued) while preparing to refill.
Refilling the CVT
- Access the filler port on top of the transmission — usually on the upper-front of the case, marked with a yellow cap on most production years.
- Using a hand pump or funnel with a long hose, add approximately 3.0 litres of fresh NS-3 CVT fluid through the filler port. A drain-and-refill on the Pulsar’s RE0F11A typically takes ~3 L (the unit’s total dry capacity is 7–8 L, but you only replace what drained).
- Reinstall the overflow tube using a new sealing washer. Torque to 15 Nm.
- Reinstall the drain plug using a new sealing washer.
- Torque the drain plug to 34 Nm.
- Lower the vehicle back to the ground.
Circulating the Fluid
- Start the engine and keep your foot firmly on the brake pedal.
- Move the gear selector slowly through all positions: P → R → N → D → L. Pause for about 5 seconds in each position so the fluid has time to circulate through the valve body.
- Return the selector to P and let the engine idle.
- Monitor the CVT fluid temperature using the scanner or IR thermometer. The target range for level-checking is 35–45 °C — below 35 the fluid is too cold and will read low; above 45 it expands and reads high.
- Once the fluid hits the 35–45 °C window, stop the engine.
Checking the Fluid Level
- Raise the vehicle again on stands.
- Position the drain pan to catch any spillover.
- Remove the drain plug (do NOT remove the overflow tube this time — it’s the level reference).
- Slowly add about 0.5 litres of fresh CVT fluid through the filler port.
- Watch the drain opening — when fluid begins to trickle and then drip steadily from the overflow tube’s level, the fluid is at correct level.
- Reinstall the drain plug with a fresh sealing washer.
- Torque the drain plug to 34 Nm.
- Lower the vehicle and switch the engine off.
Torque Specifications
- CVT drain plug: 34 Nm (replace sealing washer every time)
- Overflow tube: 15 Nm (replace sealing washer)
Troubleshooting
- Drain plug seized. If the plug won’t turn with a normal-length socket wrench, do NOT use an impact gun — the plug is shallow and the head can shear off. Apply penetrating fluid (PB Blaster, WD-40 Specialist), wait 15 minutes, and use a long breaker bar. If the head shears, the only path is removing the sump pan, which doubles the job.
- Fluid won’t drip from the overflow after adding the 0.5 L. Either the fluid is too cold (re-warm via the circulation procedure) or you’ve overfilled — there’s not enough headroom for the overflow to function. If overfilled, drain a small amount and recheck.
- Harsh shifting or judder appears after the change. Almost always means wrong fluid spec or contaminated old fluid wasn’t fully drained. A second drain-and-refill 100 km later removes most of the remaining old fluid and usually clears the symptom.
- Fluid smells burnt when drained. Bad sign — the CVT has been overheated, often by towing or repeated full-throttle launches. A drain-and-refill helps but doesn’t reverse damage. Monitor for harsh shifting in the following months.
Frequently Asked Questions
How often should I change the CVT fluid on the Pulsar?
Nissan’s official spec is “fill for life” — no scheduled change. In real-world owner experience, every 60,000 km is the consensus interval for keeping the RE0F11A healthy. Shorten to 40,000 km if you tow, live in a hot climate, or drive mostly stop-and-go.
Can I do a complete fluid exchange instead of just drain-and-refill?
Yes — a full flush requires a CVT-specific fluid exchanger that hooks into the cooler lines and cycles new fluid through while the engine runs. It exchanges around 90% of the fluid in one session vs ~40% with drain-and-refill. Cost is roughly 3× the parts, and the equipment is dealer or specialist only. For DIY, three drain-and-refills spaced 1,000 km apart approximates a full exchange.
What does the RE0F11A designation mean?
“RE0F11A” is Nissan’s internal designation. The transmission is also known by Jatco’s name “JF015E” — Jatco builds the unit on behalf of Nissan. Both names refer to the same hardware; parts catalogues use them interchangeably.
Will the wrong fluid actually damage the CVT?
Yes, and quickly. CVT fluid has very specific friction characteristics that allow the steel push-belt to grip the variator pulleys without slipping. Conventional ATF allows the belt to slip, which polishes the pulley faces. Polished pulleys mean permanent damage requiring transmission replacement. Use only NS-3 or a documented NS-3-equivalent.
Why is the overflow tube system used instead of a dipstick?
The overflow tube system gives a temperature-compensated level check that’s more accurate than a dipstick on a CVT. CVT fluid is more sensitive to over- and under-filling than conventional ATF — the level affects line pressure across the variator. The overflow tube’s height is a precise reference point, and the temperature window (35–45 °C) makes the level repeatable.
Disclaimer: The information on this page is provided for general guidance only. Always follow your official service manual and safety precautions when working on your vehicle. We are not responsible for errors, omissions, or any damage resulting from the use of this information.
This website is an independent resource and is not affiliated with, endorsed by, or sponsored by Nissan. All trademarks and brand names belong to their respective owners.