These instructions apply to the Kia Picanto Mk2 (TA) 2011-2017. For other models, please choose your vehicle here.
Last updated:
The Kia Picanto TA (2011–2017) uses a 12V lead-acid battery (or AGM on ISG-equipped trims) that powers all of the car’s electronics. Disconnecting it for replacement, electrical work, or storage is a 10-minute job, but several systems lose stored settings on disconnect and need re-initialisation after reconnection. Follow the order below to keep the radio code intact and avoid post-reconnect surprises.
Before You Start
- Park safely, switch the ignition OFF, and remove the key.
- Switch off all electrical consumers (lights, infotainment, climate control, heated seats).
- If working near airbags or seatbelt pretensioners, wait at least 3 minutes after switching off ignition before disconnecting — the airbag module needs time to power down its capacitor.
- Use insulated tools — a slipped spanner across both terminals welds itself to the body and ruins your tools (and possibly the battery).
Tools and Supplies
- 10 mm spanner or socket for the terminal clamps.
- 12 mm spanner for the hold-down bracket (if removing the battery completely).
- Wire brush and terminal cleaner for any corrosion.
- Dielectric grease or petroleum jelly for the terminals on refit.
- Optional: OBD-II memory saver to preserve infotainment / climate-control settings during the swap.
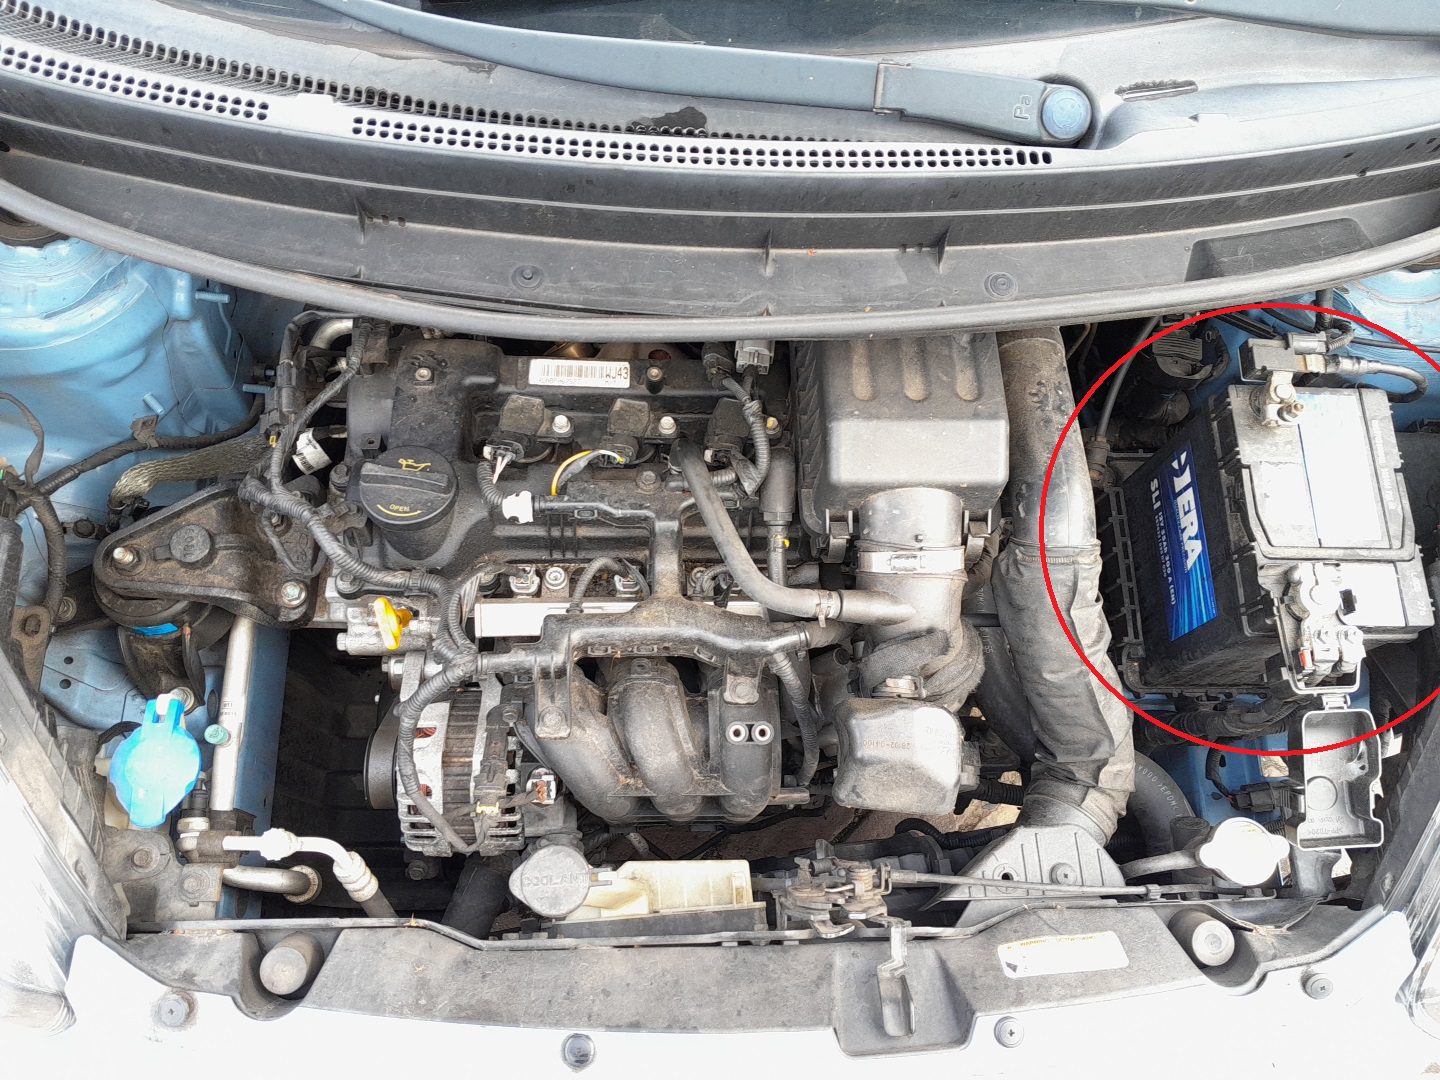
Battery Location
The 12V battery sits in the engine bay on the left-hand side (driver’s side on LHD models), secured by a clamp bracket that wraps over the top of the battery casing.
How to Disconnect the Battery
- Confirm ignition is OFF and the key is removed.
- Open the bonnet and identify the negative (–) and positive (+) terminals. The negative is usually marked with a black cover or “NEG” stamp.
- Loosen and remove the negative (–) terminal first using the 10 mm spanner; move the cable aside so it can’t fall back onto the post.
- Loosen and remove the positive (+) terminal.
- If removing the battery completely: undo the 12 mm hold-down bracket nut, lift the bracket clear, then lift the battery out with both hands.
How to Reconnect the Battery
- Place the battery in its tray (orient it so the cables reach the correct terminals).
- Refit the hold-down clamp — snug but not enough to crack the casing.
- Connect the positive (+) terminal first and tighten the clamp.
- Connect the negative (–) terminal last and tighten.
- Wiggle each terminal — there should be no movement once tightened.
- Optionally smear a thin coat of dielectric grease over the clamp / post contact for corrosion protection.
After Reconnecting — What to Re-Initialise
- Date and time — reset via the dashboard or infotainment display.
- Radio presets and security code — enter the code if prompted, then save your preset stations.
- Trip computer — reset Trip A / Trip B as desired.
- Power windows — re-initialise the auto-up/down function by closing the window fully and holding up for 2 seconds, then fully opening and holding down for 2 seconds. Repeat for each window that has auto operation.
- Electric sunroof (if equipped) — fully open and close once using the switch.
- Climate control — confirm normal operation; the auto-mode actuators relearn end positions on the first power-up.
- Start/Stop (ISG) — won’t engage for the first few drive cycles while the ISG module learns the new battery’s state of charge.
Tips for Safe Handling
- Always disconnect negative first, reconnect negative last.
- Don’t use open flames near the battery — flooded lead-acid batteries vent hydrogen during charging, which is flammable.
- Battery acid burns skin and damages paint — rinse with plenty of water if spilled.
- If the car will sit unused for more than two weeks, connect a battery maintainer (CTEK MXS 3.8 or similar) to keep the charge stable.
- Apply dielectric grease to terminals to reduce future corrosion.
Troubleshooting
- Engine struggles to start after reconnect. Check that clamps are clean and tight. Wire-brush both the cable terminal and the battery post if there’s any white corrosion — it’s an electrical insulator.
- Radio shows “CODE” and won’t play. Enter the code from your owner’s pack. If lost, your local Kia dealer can retrieve it from your VIN — usually free with proof of ownership.
- Warning lights stay on after reconnect. Most clear after one or two drive cycles. Lights that persist past 50 km of driving need scan-tool diagnostics.
- Power windows don’t auto-up. Re-initialise the windows per the procedure in the after-reconnect list above. Most often only the driver’s window needs the procedure.
- ISG won’t engage at all. Normal for the first week — the ISG module needs to learn the new battery’s voltage characteristics. Drive a mix of city and highway; ISG returns gradually.
Frequently Asked Questions
How long does a Picanto TA battery last?
A standard 12V battery typically lasts 4–6 years. The AGM battery on ISG trims runs 6–8 years thanks to its deeper-cycle design. Heat shortens life — cars in southern Europe / hot climates see 3–4 years on standard, 5–6 on AGM.
Can I substitute a standard battery for the AGM on an ISG-equipped Picanto?
No. A standard flooded battery in an AGM-spec ISG car will fail within 6–12 months — the ISG system runs the battery through partial-charge cycles that flooded batteries aren’t designed to handle. Match the battery type to your original spec.
Why disconnect the negative terminal first?
The car body is grounded to the negative terminal. With the negative still connected, if a tool slips and touches metal while you’re removing the positive, the tool completes a circuit and you get an arc / shorted spanner. Removing the negative first breaks the circuit at the chassis side; touching the positive can’t then short to anything.
Will replacing the battery require dealer-only registration on the ISG variant?
The Picanto TA pre-dates Hyundai-Kia’s “battery monitoring sensor” registration requirement that newer models use. On the TA, a new AGM battery works fine without any scan-tool registration. The newer JA (2017+) has a BMS sensor and may benefit from a “battery change” scan — most independent garages can do this for €15–20.
The Picanto TA has a small battery. Can I fit a bigger one for better cold starts?
The battery tray and hold-down bracket limit physical size. A higher cold-cranking-amp (CCA) rating within the same physical size is fine — many owners upgrade from the standard 45 Ah to a 50 Ah Bosch S4 or Varta Blue Dynamic for cold-climate performance. Don’t try to fit a larger physical case; it won’t clear the hold-down bracket and might rub on the bonnet underside.
Disclaimer: The information on this page is provided for general guidance only. Always follow your official service manual and safety precautions when working on your vehicle. We are not responsible for errors, omissions, or any damage resulting from the use of this information.
This website is an independent resource and is not affiliated with, endorsed by, or sponsored by Kia. All trademarks and brand names belong to their respective owners.