These instructions apply to the Opel Zafira Mk3 (P12) 2011-2019.
For other models, please choose your vehicle here.

Bleeding the brake system on an Opel Zafira Tourer removes trapped air from the hydraulic lines so that the pedal feels firm and consistent every time you press it. Brake fluid is almost incompressible, but air is not, so even a small pocket of it in a caliper, hose or the master cylinder leaves the pedal feeling soft, spongy or long before the brakes bite. Bleeding is normal workshop maintenance that becomes necessary whenever the hydraulic circuit has been opened — after a caliper, hose, master cylinder or fluid change — and it is also part of the routine fluid replacement most owners schedule every couple of years. It is not a fault in itself; it is simply how air is purged from a sealed system. The notes below apply to the Zafira Tourer with a conventional hydraulic braking system and follow the model’s own bleed sequence.
How Bleeding Works on This Model
The Zafira Tourer routes brake fluid from the reservoir through the master cylinder to each of the four wheels. Because the rear brakes sit furthest from the master cylinder along the pipe run, they are bled first, working forward to the wheel closest to the reservoir last. Pressurising the reservoir with a bleed device pushes fresh fluid through the whole circuit in one direction, carrying any air out through the bleed screw at each caliper. This guide covers vehicles without an electro-hydraulic brake system; if your car has that type of system it may need a scan tool to cycle the pump and valves, which is beyond a manual bleed.
Before You Begin
- Ensure the brake fluid level is between the MIN and MAX marks before and throughout the process, and keep the reservoir topped up so it never runs dry.
- Do not switch the ignition on during the bleeding process.
- Inspect the complete braking system and hydraulic clutch system for leaks.
- Use fresh brake fluid of the grade specified for your car and never reuse fluid that has been exposed to air; check your handbook or the reservoir cap for the correct specification.
- Allow the brakes to cool down before starting.

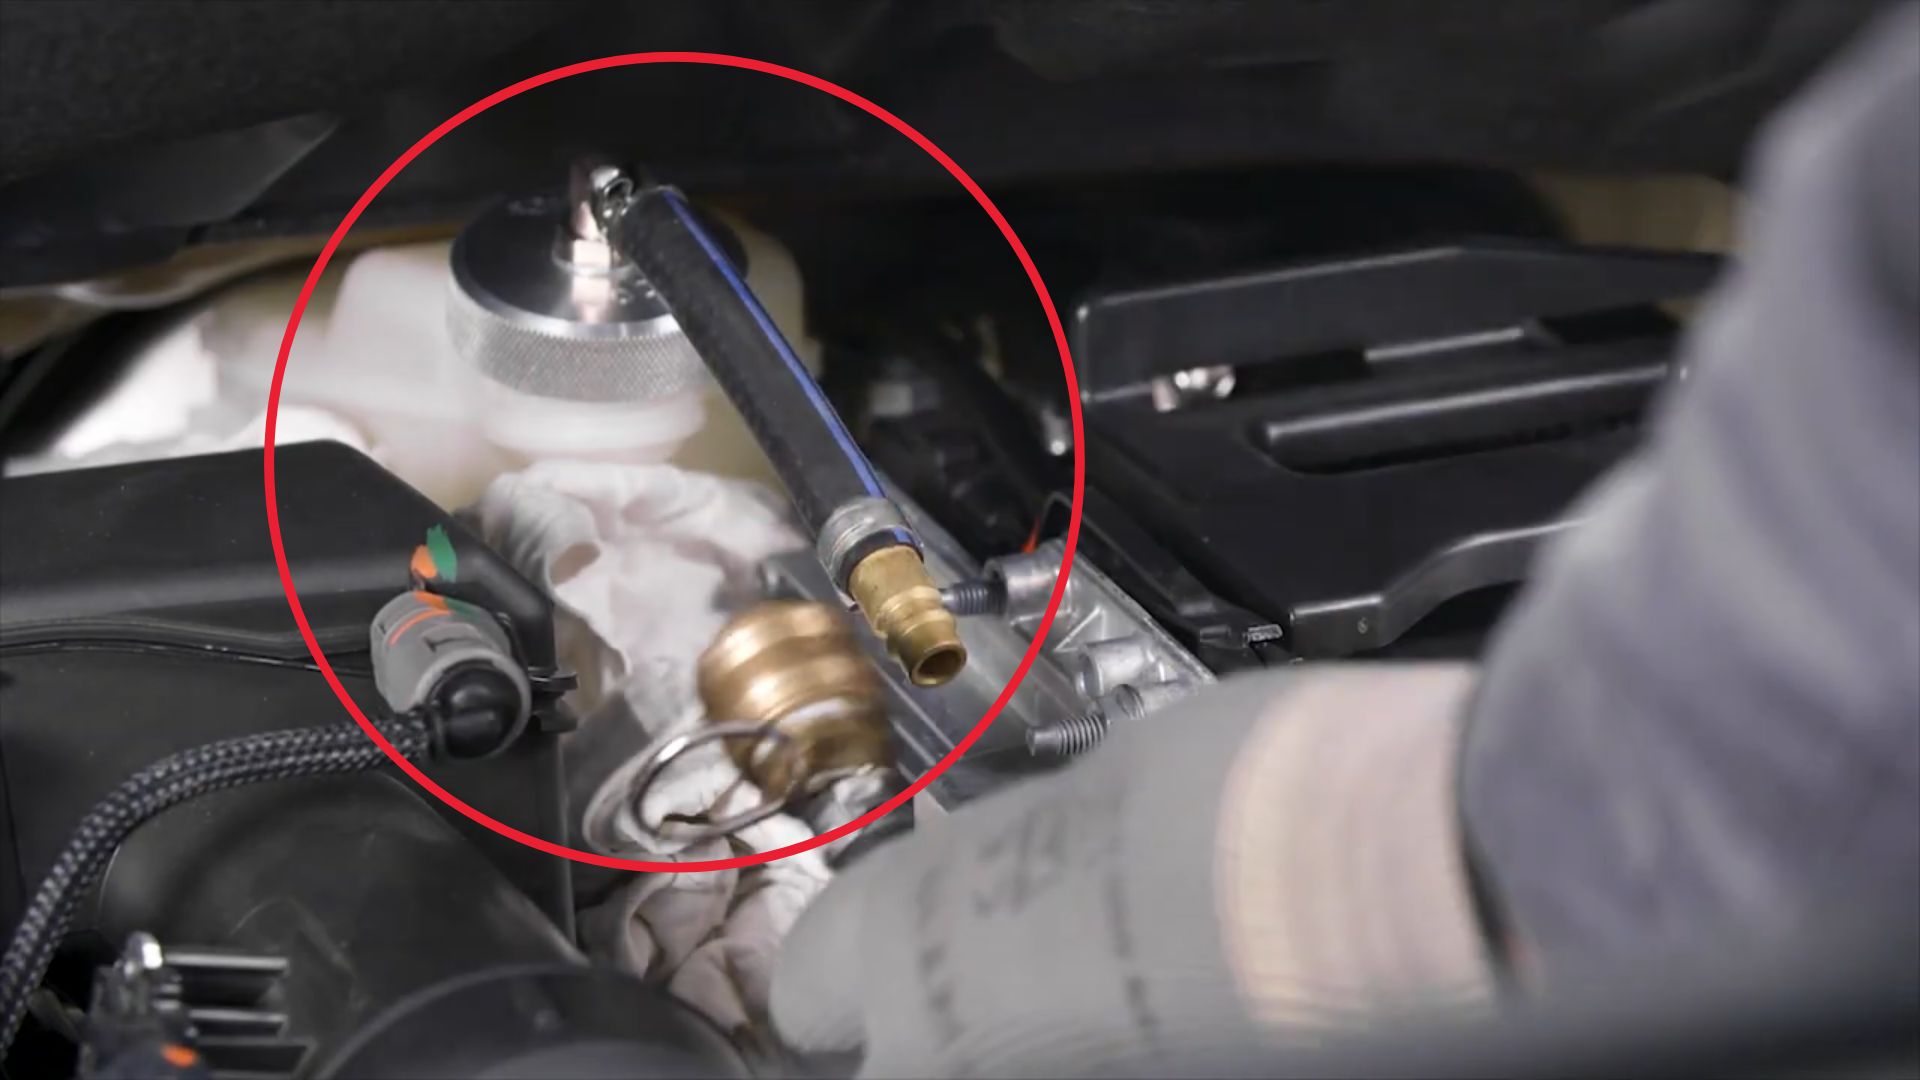
Example of a pressure brake bleeding device connected to the brake fluid reservoir.
Brake System Bleeding Procedure
- Release the parking brake.
- Switch the ignition OFF.
- Press the brake pedal several times until a firm resistance is felt.
- Remove the brake fluid reservoir cap.
- Connect a brake bleeding device to the reservoir.
- Gradually increase the system pressure to 2.0–2.5 bar.
- Raise the vehicle safely.
- Bleed the brakes in the following order:
- Rear right brake
- Rear left brake
- Front right brake
- Front left brake
- Attach a transparent hose to the bleed screw.
- Open the bleed screw and allow fluid to flow until it is clear and free of air bubbles.
- Close the bleed screw.
- Repeat the procedure for each wheel in the specified sequence.
- Lower the vehicle.
- Disconnect the bleeding device.
- Refit the brake fluid reservoir cap.
If the Pedal Still Feels Soft
- Confirm you followed the sequence exactly — rear right, rear left, front right, front left. Bleeding out of order can leave air in a line.
- Check that the reservoir never dropped below MIN during the process; if it did, air will have been drawn in and the whole sequence must be repeated.
- Make sure each bleed screw was fully closed before moving to the next wheel, and that no screw is weeping.
- Inspect every union, hose and caliper for a slow leak that keeps drawing air back in.
- Verify the bleed device held steady pressure at 2.0–2.5 bar; too little pressure can leave stubborn bubbles behind.
- If the pedal remains long or sinks slowly under steady foot pressure, stop and have the master cylinder and hydraulic system inspected before driving.
After Bleeding
- Recheck the brake fluid level and top up if necessary.
- Inspect the entire braking system again for leaks.
- Ensure the brake pedal feels firm before driving.
- Take a short, low-speed test drive in a safe area to confirm the brakes bite normally and the pedal stays firm before returning to traffic.
Frequently Asked Questions
Why are the rear brakes on the Zafira Tourer bled first?
The rear calipers are the furthest points from the master cylinder along the pipe run, so working from the most distant wheel back toward the reservoir pushes air out in a logical order. Following the rear right, rear left, front right, front left sequence keeps fresh fluid moving through the whole circuit without trapping pockets of air.
Why must the ignition stay off while bleeding?
This procedure is for a conventional hydraulic system, and it is carried out with the ignition off so the braking electronics are not activated during the process. Keep the ignition switched off from start to finish and only turn it on again once the reservoir cap is refitted and the pedal feels firm.
What pressure should the bleed device be set to?
Set the pressure bleeder gradually to between 2.0 and 2.5 bar. That range is enough to push fresh fluid steadily through each caliper and carry air out of the open bleed screw, without over-pressurising the reservoir. Increase the pressure slowly rather than in one jump.
How often should the brake fluid be changed?
Brake fluid is hygroscopic, meaning it absorbs moisture over time, which lowers its boiling point and can affect braking under heavy use. Many owners renew it on a routine schedule of roughly every couple of years. Check your handbook for the exact interval and the correct fluid specification for your Zafira Tourer.
Can I bleed the brakes without a pressure device?
The method above uses a pressure bleeder connected to the reservoir, which is the cleanest way to keep the system topped up while air is purged. Two-person pedal bleeding is a common alternative on conventional systems, but you must still follow the same wheel sequence and never let the reservoir run dry between wheels.
Does bleeding the brakes clear warning lights or fault codes?
No. Bleeding only removes air from the hydraulic lines; it does not read or clear stored fault codes. If an ABS or brake warning light stays on after bleeding, the cause is electronic or sensor-related and needs diagnosis. For help interpreting a specific brake-related trouble code, see the code guides at autodtcs.com.
Independent guide — not affiliated with Opel. Always follow your official service manual and safety precautions. Read our full disclaimer.